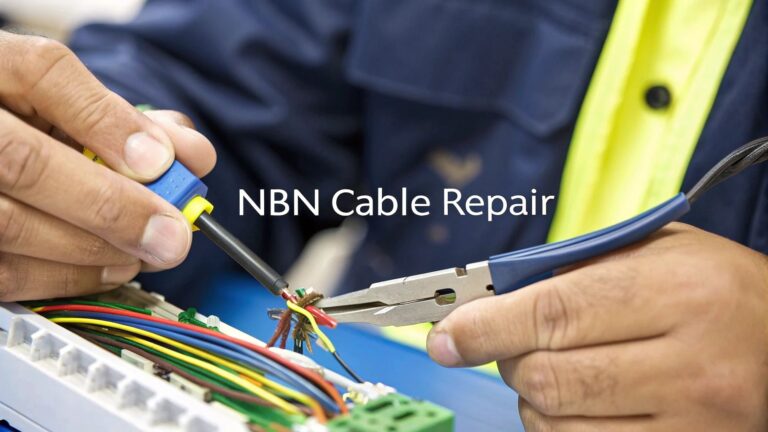
Let's be honest, nothing makes your blood pressure spike faster than the Wi-Fi dropping out halfway through the season finale or during a critical work call. If you're on the Central Coast, you've probably cursed the NBN or your internet provider more than once. But often, the real culprit isn't them—it's your over-reliance on Wi-Fi itself. Proper internet cabling in your home creates a direct, rock-solid connection, finally killing the lag, buffering, and dropouts that drive you spare.
Why Your Wi-Fi Is Letting You Down

Think of Wi-Fi like trying to have a serious chat by yelling across a packed pub in The Rocks on a Friday night. Your message (the data) has to battle through a heap of noise and obstacles—walls, furniture, even the microwave—just to get to the other side. It’s no wonder the signal gets weak and muddled along the way.
This interference is exactly why your 4K movie suddenly looks like a pixelated mess from the 90s, your Zoom call freezes on a deeply unflattering expression, or you get booted from a gaming server at the worst possible moment. While there are a few tricks for how to boost your Wi–Fi signal, they're often just putting a plaster on a bigger problem.
The Power of a Wired Connection
A hardwired connection, using a good old ethernet cable, is the complete opposite. It’s like having a private, soundproof tunnel running directly from your router to your device. There's no interference, no signal drop-off, and you're not competing for airtime with your neighbour’s ten smart speakers.
This direct line means you get the full-throttle speed of your internet plan pumped straight into your computer, smart TV, or gaming console. It’s the secret to actually getting what you pay for from your NBN connection.
Speaking of the NBN, it was launched way back in 2009 to bring high-speed broadband to the vast majority of Aussie homes. By August 2025, NBN coverage had reached 12.59 million premises, which means over 95% of residences are now connected to its wired infrastructure.
Meet Your New Best Mates: Cat6 and Cat6a
When we talk about internet cabling for your home, we’re usually talking about ethernet cables—specifically, Cat6 or Cat6a. Don’t let the jargon put you off; the idea is pretty straightforward.
- Cat6 Cable: This is the current champion for most homes in Sydney, Newcastle, and on the Central Coast. It can easily handle the fastest NBN plans out there, making it perfect for buffer-free streaming, competitive gaming, and a reliable work-from-home setup.
- Cat6a Cable: Think of this as the heavy-duty, future-proofed version of Cat6. It supports even higher speeds and has better shielding against electrical interference. It's a smart choice if you're running longer cables or just want to make sure your network is ready for whatever comes next.
The bottom line is simple: if you want fast, reliable internet without the headaches, a wired connection is non-negotiable. It transforms your internet experience from a frustrating gamble into a dependable utility you can count on.
Planning Your Home Network Like a Pro
Right, before you even think about picking up a drill, let’s get a plan in place. A bit of forward thinking is the difference between a slick, professional-looking setup and a mess of cables that looks like a snake’s wedding reception. Winging it is a recipe for disaster and a surefire way to end up with cables running where you don’t want them.
The first step is to grab a pen and paper (or an app on your tablet) and sketch out a rough floor plan of your place. It doesn't need to be a masterpiece worthy of an architect; just a basic layout of the rooms will do the trick. Now, start marking the mission-critical zones.
Identifying Your High-Demand Hotspots
Think about where you absolutely need a rock-solid, lightning-fast connection. These are the spots where Wi-Fi just won't cut it, no matter how many times you restart the router.
- The Home Office: This is non-negotiable. For video calls, large file transfers, and general sanity, a hardwired connection is essential.
- The Entertainment Hub: Your lounge room is probably home to a smart TV, a gaming console like a PS5 or Xbox, and maybe an Apple TV. Each of these devices will perform infinitely better with a dedicated cable.
- The Kids' Rooms: Whether it's for online learning or keeping them from raging about lag during their Fortnite sessions, a wired connection brings peace to the household.
- The Wi-Fi Black Hole: Every house has one. That one bedroom or back corner where the Wi-Fi signal notoriously goes to die. Pop a data point there for a future wireless access point.
A Newcastle homeowner we worked with, Dave, was at his wit's end with patchy internet. His new smart home felt anything but smart. By mapping out these key zones, we transformed his place from a connectivity nightmare into a fully wired, high-speed haven.
Once you’ve marked your hotspots, you can start thinking about the bigger picture. Each of these locations will need a dedicated cable run, and you can learn more about what's involved with installing these connection points in our guide to data point installation. This is the blueprint for your home's new digital nervous system.
Choosing a Central Command Centre
Every great network needs a central hub. All your internet cables will run from their respective rooms back to this single point. This is where your modem, router, and a network switch will live, keeping everything neat and organised. You don’t need a dedicated server room; a bit of creative thinking is all it takes.
Ideal spots for a network hub include:
- A linen cupboard
- Under the stairs
- A corner of the garage
- The top shelf of a wardrobe
The key is to pick a spot that's out of the way but still has access to a power point. This centralisation makes troubleshooting a breeze and keeps the blinking lights and cable spaghetti hidden from view.
Plotting the Path of Least Resistance
Now, let's connect the dots. The goal is to plan the most efficient and hidden routes for your cables, running from your new hub to each data point. For a typical Aussie home, this usually means running cables through the ceiling cavity or under the floor.
It’s crucial to plan these routes carefully to avoid common stuff-ups. One of the biggest mistakes DIYers make is running data cables parallel to electrical wiring. This is a massive no-no. The electrical field from power cables can create "noise" or interference that wrecks your internet signal, slowing it down or causing dropouts.
Always aim to cross power cables at a 90-degree angle if you must, and maintain as much separation as possible. Planning this on paper first saves you the headache of having to re-run a cable later. Taking a few extra minutes to map out clean, interference-free paths ensures your new internet cabling home network performs at its absolute best from day one.
Choosing Your Gear Without The Headache
Walking into an electronics store or browsing online for networking gear can feel like you're trying to decode a foreign language. Don't stress, we've got your back. This section is your no-nonsense shopping list for your internet cabling home project, making sure you get the right stuff the first time without getting ripped off.
Let's start with the most important bit: the cable itself. You'll see a few options on the shelf, but for a new installation inside your walls, spending a few extra bucks now will save you a world of pain later. Think of it as an investment in your sanity.
Picking The Perfect Cable
For most homes around the Central Coast, Cat6 cable is the reliable workhorse. It's more than capable of handling the zippiest NBN plans available today, giving you plenty of speed for 4K streaming and lag-free gaming.
However, if you really want to future-proof your setup, Cat6a is the smart move. It offers much better shielding against electrical interference (from things like power cables) and guarantees top speeds over longer distances, which is a big deal in larger homes.
The push for better infrastructure is real. As of August 2025, a massive 86% of premises in the NBN's fixed-line footprint could already access speeds approaching 1 Gbps. With 4.74 million premises now on future-proof connections, it's clear that faster speeds are coming, and Cat6a ensures you're ready for them. You can read more about the NBN's progress toward faster speeds.
To make it dead simple, here’s a quick comparison of your main options.
Ethernet Cable Quick Comparison
This table breaks down the common ethernet cables you'll find, helping you pick the right one for your home network.
| Cable Type | Max Speed | Best For | Typical Cost (per 50m roll) |
|---|---|---|---|
| Cat5e | 1 Gbps | Budget-friendly basic networking, but not recommended for new in-wall installations. | $30 – $50 |
| Cat6 | 10 Gbps (up to 55m) | The solid standard for most modern homes, great for streaming and gaming. | $60 – $90 |
| Cat6a | 10 Gbps (up to 100m) | The best choice for future-proofing, especially for longer runs or smart homes. | $100 – $150 |
For any new runs going into the walls, I’d strongly recommend sticking with Cat6 or Cat6a. The small price difference now is nothing compared to the hassle of re-running cable in a few years.
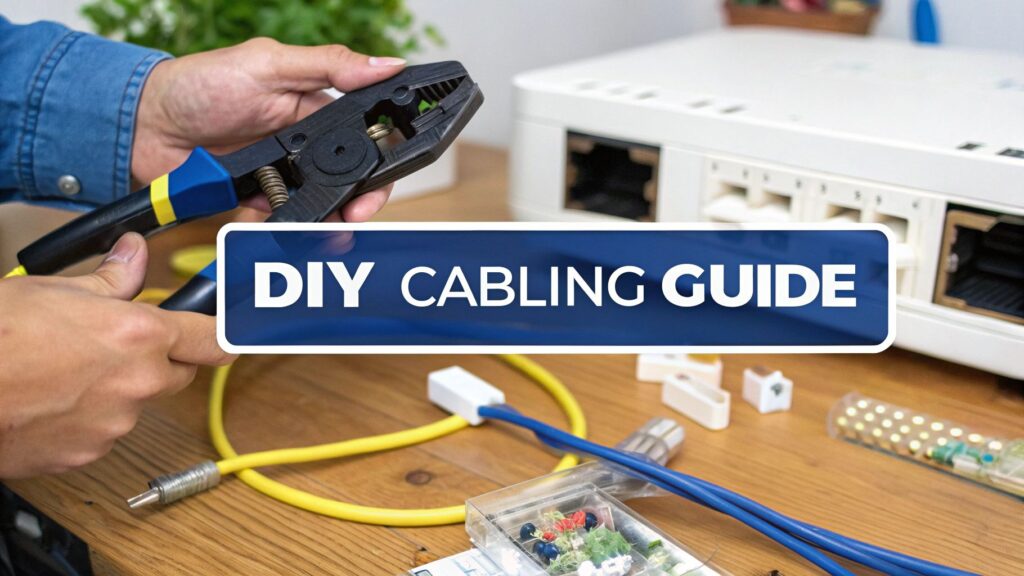
Your Essential Toolkit
You don’t need a sparky’s entire van, but a few key tools will make this job go from frustrating to surprisingly satisfying. Seriously, having the right gear turns a tricky task into a straightforward process.
Here's what you'll absolutely need:
- A good crimper: This tool attaches the plastic RJ45 connectors to the end of your cable. Don’t cheap out here—a dodgy crimper will cause endless connection headaches.
- A cable tester: This little gadget is your best mate. It plugs into both ends of your new cable and tells you instantly if you've wired it up correctly. It’s a massive time-saver.
- A wire stripper/cutter: Most crimpers have one built-in, but a dedicated tool makes the job cleaner and easier.
- RJ45 Connectors & Wall Plates: These are the plugs and sockets that make your installation look clean and professional.
This simple infographic breaks down the workflow for getting your gear sorted.
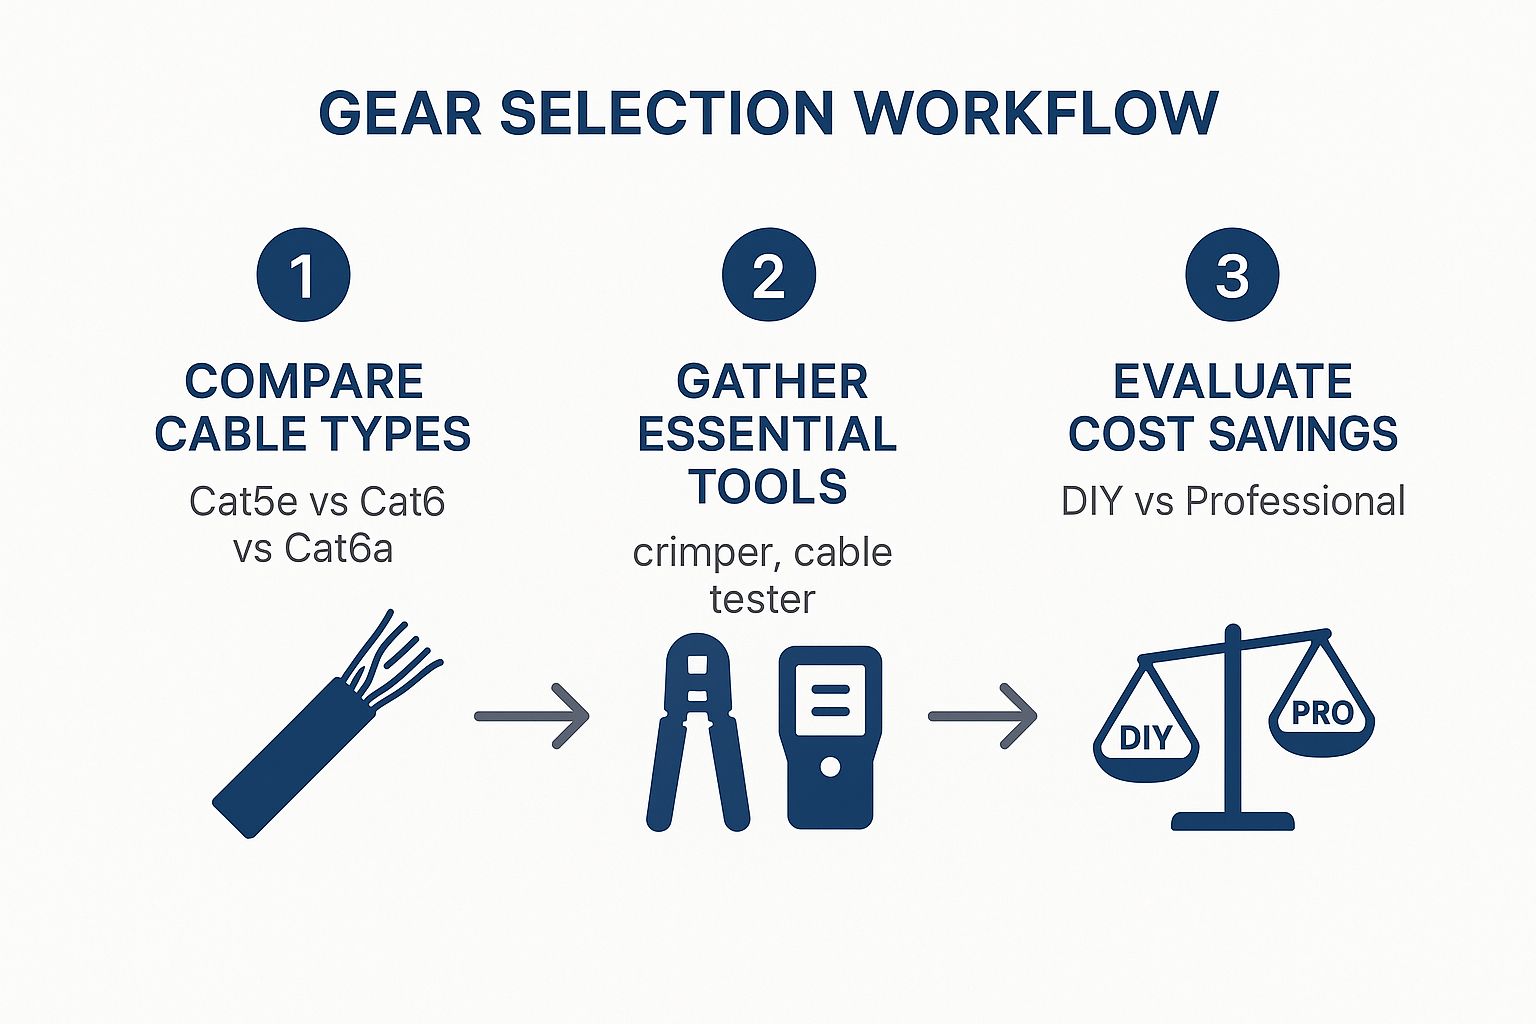
Following this process helps you compare your options, gather the right tools, and understand the real savings of a DIY approach.
Pro Tip: If you're running a single cable to your TV unit to connect multiple devices (like a TV, PlayStation, and Apple TV), you'll need a small 'network switch'. It acts like a power board for the internet, turning one connection into many.
The Cost Breakdown: DIY vs Pro
So, what’s the damage? A basic DIY toolkit and a 50-metre roll of quality Cat6a cable will set you back around $200-$250. That’s usually enough to wire up a couple of key rooms in a standard Sydney home.
Hiring a professional for the same job could cost anywhere from $500 to $800+, depending on the complexity of the run. By doing it yourself, you’re not just saving a significant amount of cash—you’re also gaining a valuable skill. It's a win-win.
Keep in mind that for more complex setups, especially if your Wi-Fi struggles across a large area, understanding the difference between a Wi-Fi extender vs a mesh system can help you build an even more robust network.
Getting The Cables In Place
Alright, you've got your plan and your gear ready to go. Now for the fun part: turning that blueprint into a physical, high-speed network.
This is where you'll start pulling cable, and honestly, it’s not as daunting as it sounds. With a few tricks of the trade, you can get it done cleanly and efficiently. The goal here is simple: get the cable from your central hub to each outlet with minimal fuss.
Whether you're working through a ceiling cavity or navigating the space under your floor, the core principles don't change. Take your time, be gentle with the cable, and always think one step ahead.
The Art of a Clean Cable Pull
Here’s a classic trick to make your life easier. Before you even think about pushing a cable through a wall, grab a bit of string and tie a small weight to it, like a spare nut or bolt. Drop this from your entry point in the ceiling or pull it up from under the floor. Once the weighted string is through, just tape your ethernet cable securely to the end and gently guide it into place. It beats trying to blindly shove a flimsy cable through a wall cavity any day of the week.
A few golden rules I've learned over the years:
- No Kinks! Whatever you do, don't pull the cable so tight that it creates a sharp 90-degree bend. This can wreck the delicate copper wires inside and kill your performance. Always aim for gentle, sweeping curves.
- Leave Some Slack. I can't stress this enough. Always leave about a metre of extra cable at both ends. You'll thank yourself later when you're connecting the ends or if you ever need to make changes down the track.
- Keep Your Distance. As we touched on earlier, keep your data cables as far away from electrical wiring as you can. If you absolutely have to cross a power line, make sure you do it at a right angle to minimise any potential interference.
Think of the cable as the backbone of your network. Treat it with a bit of respect during the pull, and it'll reward you with rock-solid performance for years. Rushing the job and yanking on the cable is just asking for trouble you'll have to diagnose later.
Terminating Your Cable Like a Pro
"Terminating" is just the industry lingo for putting the connectors on the ends of the cable. This is where you connect the eight little coloured wires to either an RJ45 plug or a wall plate. It looks a bit fiddly at first, but trust me, after you do one, you'll get the hang of it pretty quickly.
The most critical part of this whole process is getting the wire order right. There are two standards, T568A and T568B. Here in Australia, T568A is the mandated standard for all new installations, so that’s the one we’re sticking with.
You’ll need to get this colour order perfect:
- Green/White
- Green
- Orange/White
- Blue
- Blue/White
- Orange
- Brown/White
- Brown
Getting that sequence right is everything. A mate of mine spent an entire Saturday trying to figure out why his new connection was dead. He'd done a fantastic job running the cable, but he’d mixed up the orange and green pairs at the jack. It's a classic rookie mistake, but it's also incredibly easy to avoid if you just take a moment to double-check the colour code.
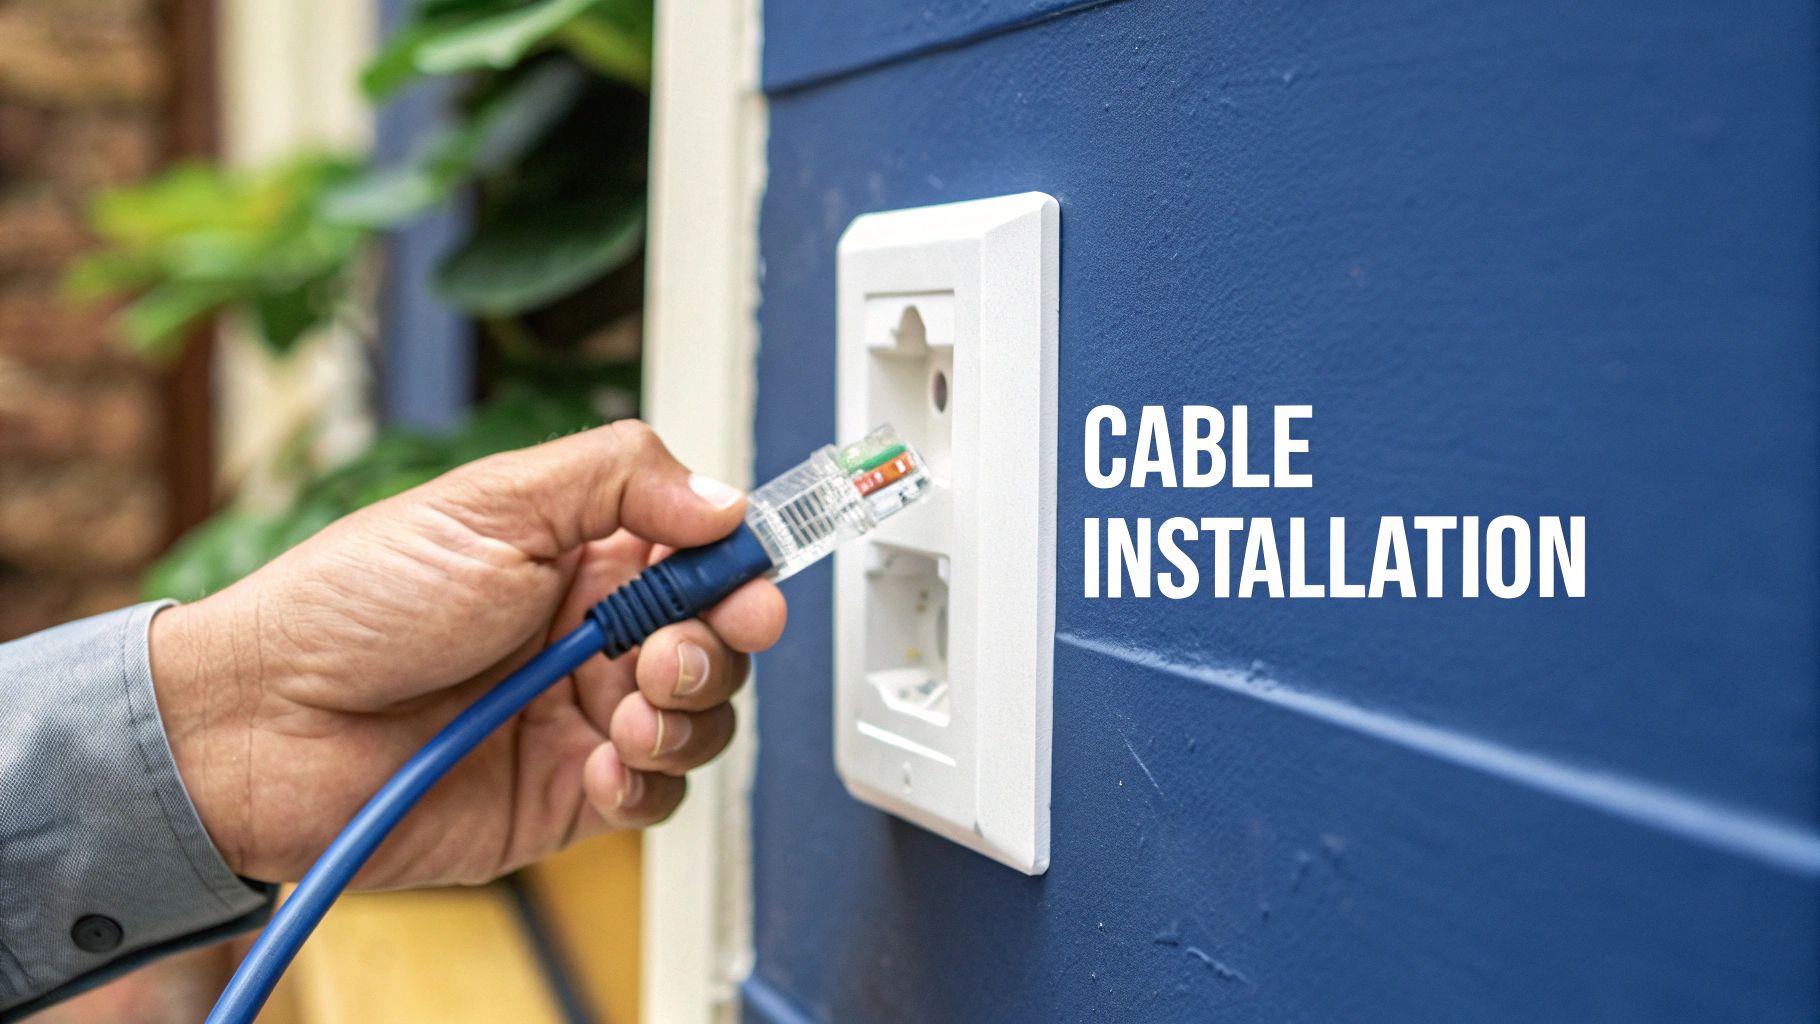
Wiring Up a Wall Plate
For that clean, professional look, you'll be terminating your cable runs to a wall plate, also known as a keystone jack.
It’s a straightforward process:
- Strip the outer jacket. Carefully cut back about 3-4 cm of the cable’s outer sheath. Be careful not to nick any of the smaller wires inside.
- Untwist and fan out the pairs. You'll see the eight coloured wires for the T568A standard.
- Line them up. The back of the keystone jack has a handy colour guide printed right on it. Just lay each wire into its matching slot.
- Punch it down. Use a punch-down tool to firmly press each wire into its slot. This neat little tool slices through the wire's insulation and creates a solid electrical connection.
- Tidy up. Trim the excess wire, clip the jack into the wall plate, and screw the whole thing onto the wall. You're done!
You'll follow the same process at the hub end, whether you're using another wall plate or wiring into a patch panel.
While this guide gets you through the basics, perfecting these connections takes practice. If you're wiring up the whole house or just want the peace of mind that it's all done flawlessly, calling in a professional is never a bad idea. We have a great article on what to look for when you need to find a good local data cable installer.
With the physical work out of the way, you're just one step from testing your brand-new, lightning-fast network.
Testing Your New Supersonic Network
https://www.youtube.com/embed/enrM3O8N9p0
You’ve done the hard yards. You’ve crawled through the ceiling, pulled the cables without them getting snagged, and attached the ends like a seasoned pro. The new wall plates look schmick, but here comes the moment of truth: does it actually work?
Before you go plugging in your expensive PlayStation or work laptop, there’s one final, absolutely crucial step. This is the part that separates a successful job from a weekend of pure frustration.
Your New Best Friend: The Cable Tester
This is where a simple network cable tester comes into play. It’s an affordable little gadget that’ll save you a world of headaches. It usually comes in two parts: one you plug into the wall plate in the room, and the other you connect to the corresponding cable back at your central hub.
Once you’ve got both ends connected, switch it on. You should see a series of lights blink in sequence from 1 through to 8 on both units. If every light blinks in order, crack open a cold one – you’ve nailed it. Your new internet cabling home network is officially live.
What to Do When the Lights Go Rogue
But what happens if a light doesn’t come on, or they blink out of sequence? Don't panic. This is exactly why you bought the tester. More often than not, it’s a simple fix you can sort out in minutes.
Here’s a quick troubleshooting checklist to run through:
- A Bad Crimp: This is the most common culprit by a long shot. It just means a wire inside the RJ45 plug or wall jack isn't making proper contact. The solution is simple: snip the end off and terminate it again, making sure every single wire is pushed in firmly this time.
- Crossed Wires: If the lights on your tester are blinking all out of order, you've mixed up the T568A colour code somewhere along the line. Just double-check both ends and re-do the one that’s wrong.
- A Complete Dud: If no lights come on at all, you might have a break in the cable itself. This is rare if you were careful during the pull, but it can happen if the cable got kinked or stapled. This is also where leaving that extra slack comes in handy, as you can often just cut back past the damaged section and start fresh.
Getting it right the first time is brilliant, but learning how to diagnose a dodgy connection is a skill that will serve you well. It turns a potential disaster into a minor, five-minute inconvenience.
The Real-World Speed Test
Once your little tester gives you the all-clear, it’s time for the really satisfying part: seeing just how much faster your connection is. Grab a laptop, plug it directly into your new wall point with a short patch cable, and run a speed test online.
The results should be right up there with the maximum speed of your NBN plan. Finally, you’re getting every single megabit you pay for, without Wi-Fi eating away at your performance.
It's good to know what you're aiming for, too. The Australian Competition and Consumer Commission (ACCC) keeps a close eye on this stuff. According to their data, average NBN fixed-line download speeds during busy hours were a whopping 102% of the advertised plan speed. Congestion, which used to be a major whinge for Aussies, is now virtually a thing of the past on the fixed-line network. You can read the full ACCC report on broadband performance to see just how reliable the underlying network has become.
With your new wired setup, you can be confident you're squeezing every last drop of performance from the NBN, straight to your device.
A Few Common Questions We Get Asked
We get asked about this stuff all the time, so we've put the most common questions all in one place. After you've done the hard yards of planning, buying, and running your cables, a few nagging questions can often pop up. Here are some clear, direct answers to get your home internet cabling project sorted without any worries.
Is It Legal To Run My Own Internet Cables in Australia?
This is hands-down the most common question we hear, and the answer is a relieving one. For data cabling like the ethernet cables we've been talking about, you are absolutely free to do it yourself in your own home. Go for it!
The strict regulations you hear about apply to telephone lines or any electrical wiring, which must be handled by a licensed cabler or a sparky. But for the simple act of running an ethernet cable from your router to your computer or smart TV, you're all good to go. It falls outside those specific regulations.
That said, if you're doing a major renovation and running dozens of cables through the walls, it’s always smart to have a chat with a professional. They can make sure everything is up to code and won’t interfere with other services.
What Is The Real Difference Between Cat6 And Cat6a Cable?
Think of it like choosing between a reliable family sedan and a high-performance V8. Both will get you where you need to go, but one has a lot more grunt under the bonnet for the future.
Cat6 is the trusty sedan. It does the job perfectly for most people right now, easily supporting speeds up to 10 Gigabits per second (Gbps) over shorter distances. It's more than enough for even the fastest NBN plans available on the Central Coast or in Sydney today.
Cat6a is the V8. It also supports 10 Gbps but is engineered to maintain that top speed over the full 100-metre cable length. Crucially, it has better shielding to protect against electrical interference from things like power cables.
My advice is simple: if you're running cables inside walls, spend the extra few dollars on Cat6a. The labour is the biggest part of the job, so future-proofing with a better cable for a minor cost increase is a no-brainer. You'll thank yourself when internet speeds inevitably get even faster.
Can I Connect Multiple Devices In My Lounge Room From One Cable?
Yes, and it's a brilliant way to clean up the spaghetti junction of cables behind your TV unit. You don't need to run four separate cables from your router to the lounge room.
Instead, run a single, high-quality ethernet cable to your entertainment hub. At that end, you just plug the cable into a small, inexpensive device called a network switch. It’s basically a power board for the internet. From there, you can run short patch cables from the switch to your smart TV, PlayStation, Apple TV, and soundbar.
This gives every single device its own super-stable, full-speed wired connection. A simple 5-port switch is all most people need and will only set you back around $30-$50.
Will Hardwiring My Home Help My FTTN Connection?
One hundred percent, yes. This is a common point of confusion for people on Fibre to the Node (FTTN) connections. While FTTN uses the old copper phone line from the street to your house, the Wi-Fi signal inside your home is often the biggest bottleneck slowing you down.
By running an ethernet cable directly from your modem-router to your devices, you eliminate any speed loss and instability caused by dodgy Wi-Fi. It won't magically make your NBN plan faster than what you're paying for, but it will ensure you're getting every single megabit of that plan delivered to your device.
For streaming, gaming, and video calls, this makes a massive, noticeable difference.
For those planning a major network overhaul, you might find our detailed guide on the process of data cabling installation to be a helpful resource. It dives deeper into some of the professional techniques we use every day.
Ready to take your home internet from frustrating to flawless? The team at Advanced Comtech has been helping homeowners across the Central Coast, Sydney, and Newcastle design and install rock-solid data networks for years. Whether you need a bit of advice or a full professional installation, we’ve got you covered. Get in touch with us today!