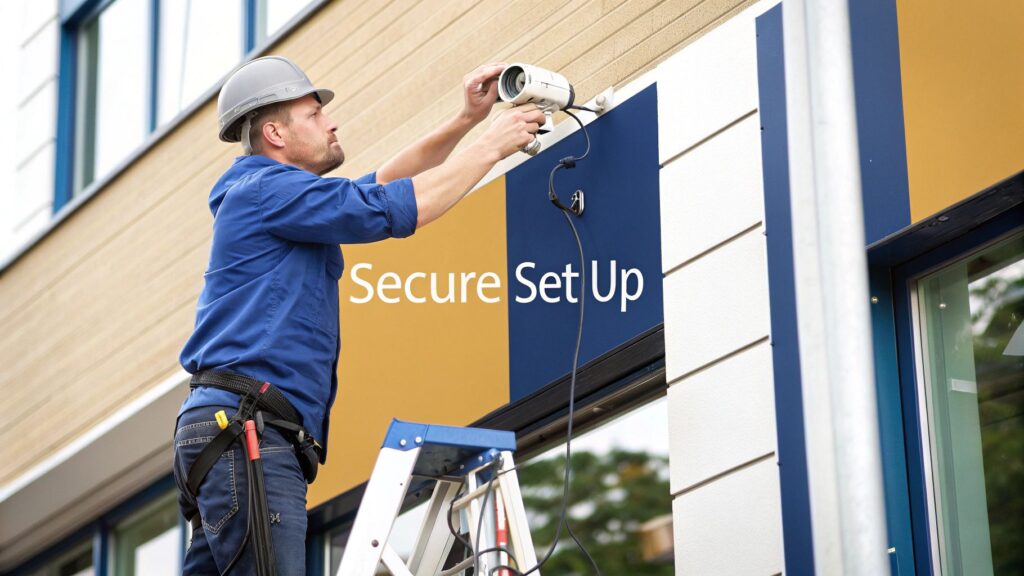
Thinking about getting commercial security cameras installed? Good on ya. It’s one of the smartest moves you can make to protect your business, your people, and everything you’ve worked bloody hard for. But let’s be clear: it’s a lot more involved than just sticking a few cameras on the wall and calling it a day.
Your Guide to a Rock-Solid Security Camera Setup
I’ve got a story for you. A café owner up in Gosford, trying to save a few quid, went out and bought a cheap DIY security kit from a big-box retailer. Sure enough, a couple of weeks later, they got broken into overnight. The thief made off with the till and some pretty expensive coffee equipment.
When the owner pulled up the footage, his heart just sank. The video was a blurry, pixelated mess. You couldn't make out a face, a number plate… nothing. That cheap system turned out to be worse than useless—it gave him a false sense of security and left him footing a massive bill with no way to catch the culprit.
This kind of story is all too common, and we hear variations of it from businesses all over, from Sydney to Newcastle. It’s a harsh lesson that really hammers home a simple truth: a successful commercial security camera installation starts with a solid plan, not a shopping cart.
Thinking Like a Security Pro
Before you even glance at a single piece of hardware, you need to put on your security hat and take a hard look at your premises. This isn't about getting paranoid; it's about being practical. Getting this part right will save you a motza down the line and make sure the system you end up with actually does what you need it to.
The goal is to shift your thinking from a vague "we need cameras" to a specific "we need a camera here to capture faces, and another one over there to watch the stock cage." The only way to get that clarity is by asking the right questions.
Start by doing a walk-through of your business. As you go, consider these points:
- What are my biggest risks? Are you worried about after-hours break-ins? Staff theft? Public liability claims from slips and falls? Or maybe vandalism? Each threat needs a different surveillance strategy.
- Where are the weak spots? Think about every possible point of entry and exit—not just the front door. Look at back alleys, fire escapes, ground-floor windows, and delivery bays.
- What do I really need to see? Is it enough to just see that a person is there, or do you need to be able to clearly identify their face or read a number plate from 20 metres away? The answer to this directly dictates the camera resolution you'll need.
Rushing into buying equipment without a clear plan is the number one mistake business owners make. A well-thought-out strategy ensures every dollar you spend on security is an investment, not an expense.
Building Your Initial Security Map
To get the ball rolling, grab a floor plan of your property. Even a rough sketch on a piece of paper will do the trick. This simple exercise is the foundation of any professional-grade setup.
Here's a quick checklist to guide your mapping:
- Mark all entry and exit points: This means every door, window, gate, and roller door. These are your absolute top priority.
- Identify high-value areas: Where’s the good stuff? Think cash registers, safes, expensive stock, server rooms, or filing cabinets with sensitive documents. These spots need dedicated coverage.
- Pinpoint chokepoints: These are the natural funnels where people have to pass through, like main corridors, reception desks, or the main path from the car park.
- Note areas with poor lighting: Any dark corners or poorly lit outdoor areas will require cameras with excellent low-light performance or powerful infrared (IR) capabilities.
This first map doesn’t have to be perfect, but it creates a powerful visual tool to start a conversation with an installation expert. For more tips on the planning phase, feel free to check out some of our other articles on CCTV and security systems. At the end of the day, it all comes down to knowing exactly what you need to protect before you decide how you're going to protect it.
Choosing the Right Gear for Your Business
Walking into the world of commercial security cameras can feel like you’ve stumbled into an IT department's private party. You're hit with a barrage of acronyms—IP, NVR, PoE, 4K—and it's enough to make anyone’s head spin. So, let’s cut through the jargon and talk brass tacks about what you actually need for your business.
I’ve seen it all. One client, a boutique law firm in Sydney, got talked into a system with more bells and whistles than a Christmas parade. They paid a premium for facial recognition and analytics they’d never use. On the flip side, I remember a small warehouse in Newcastle that tried to save a few hundred dollars buying the cheapest gear online. Six months later, half the cameras had failed from weather exposure, and the other half gave footage so grainy it was useless.
The sweet spot is in the middle: investing in quality gear that solves your specific problems without overspending. It’s about being smart, not just spending more.
Dome, Bullet, or PTZ What’s the Difference?
The type of camera you choose has a massive impact on what you can see and how you see it. It’s not just about looks; each one is a specialised tool for a specific job.
To make it simple, let's break down the main players you’ll come across.
Camera Types Explained Which One for Your Business?
| Camera Type | Best For | Pros | Cons |
|---|---|---|---|
| Dome Camera | Indoor areas like offices, retail stores, and reception areas. | Discreet and vandal-resistant. It’s hard to tell where the lens is pointing. | Limited range of view compared to other types. |
| Bullet Camera | Outdoor perimeter monitoring, car parks, and loading docks. | Highly visible, acting as a strong visual deterrent. Excellent for long-range viewing. | More susceptible to tampering and nesting birds. |
| PTZ Camera | Actively monitoring large, open spaces like event venues or construction sites. | Can pan, tilt, and zoom to track activity in real-time. One camera can cover a huge area. | Significantly more expensive and can create blind spots if not actively monitored. |
Essentially, dome and bullet cameras are the go-to choices for most fixed surveillance needs, while PTZ cameras are brought in for special, high-coverage scenarios.
This handy chart shows how often each type is picked for commercial jobs, giving you an idea of what other Aussie businesses are using.
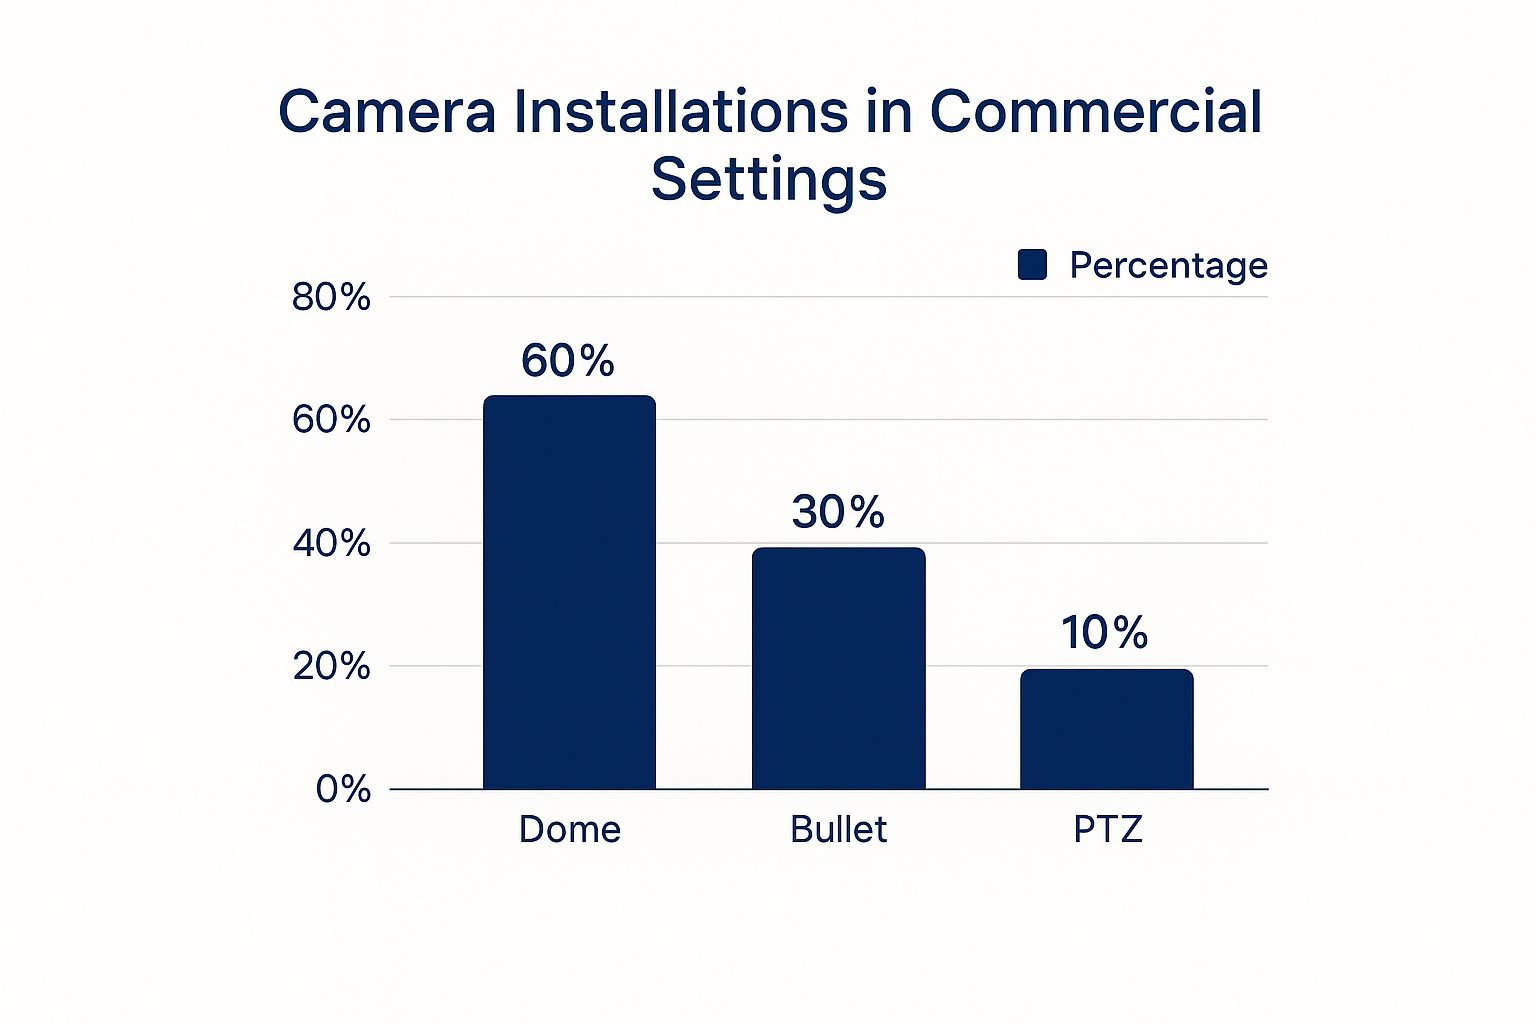
As you can see, the workhorses—dome and bullet cameras—are the clear favourites for their reliability and specific strengths.
Looking Beyond the Camera Body
Choosing the right camera style is just the beginning. The real magic—or failure—lies in the tech inside.
One of the biggest shifts in the Aussie security market is the move from old analogue systems to modern IP cameras. Today, any professional commercial security camera installation will almost exclusively use IP technology. Why? It delivers far higher resolution, gives you easy remote access, and can be integrated with other business systems.
This brings us to a critical, yet often overlooked, feature: low-light performance. A camera that’s brilliant during the day can be completely blind at night. For any Aussie business operating after dark, from a pub in Erina to a 24/7 gym in Sydney, a camera with excellent infrared (IR) is a non-negotiable. It’s the difference between seeing a clear face and a useless shadowy blob.
The heart of your system isn't the cameras—it's the recorder. Skimping on your Network Video Recorder (NVR) is like buying a Ferrari and putting retread tyres on it.
The NVR is the central brain that stores all your footage. Your main decision here is storage capacity. Don't get caught short. Calculate how many days of footage you need or want to keep (often 30 days is a good standard) and make sure your NVR’s hard drive is big enough.
Here’s a pro tip: always choose an NVR with more camera channels than you currently need. It gives you room to expand your system later without having to replace the whole unit.
Making these decisions thoughtfully ensures you build one of the best commercial security camera systems possible, giving you reliable coverage and genuine peace of mind.
Strategic Camera Placement for Maximum Coverage
Alright, you've got your hands on some top-notch gear. Now for the million-dollar question: where the bloody hell do you put it all? This is the point where a good plan becomes a great one, and where a successful commercial security cameras installation truly takes shape. Honestly, a single, perfectly placed camera is worth ten poorly positioned ones.
Let me tell you about a warehouse manager in Wyong we worked with. He was meticulous. He didn't just want cameras; he wanted a web of surveillance that left zero room for error. He walked the floor with us, mapping every entry point, high-value stock area, and exit route.
A few months later, a thief managed to sneak in, thinking they’d found a clever blind spot. What they didn't count on was a camera tucked high in the corner, planned specifically to cover that exact "hidden" path. The footage was crystal clear, and the police had a very easy job.
That story perfectly captures the essence of strategic placement. It's not about blanketing the place; it's about thinking like a thief and covering the angles that matter most.
Maximising Views and Minimising Cameras
The goal isn't to turn your business into a TV studio with cameras everywhere. It's about getting the most bang for your buck by making each camera do the work of several. You want to create overlapping fields of view that cover critical pathways without leaving any gaps.
Here are the absolute must-have spots to get you started:
- All Entrances and Exits: This is non-negotiable. Every door, roller door, and main window needs a camera. You want a clear shot of the face of anyone coming or going.
- Points of Sale: Position a camera with a clear view of the register. This is vital not just for external theft but for managing cash handling and staff integrity.
- High-Value Zones: Think server rooms, stock cages, safes, or anywhere you keep your most valuable assets. These areas need dedicated, unwavering attention.
- Car Parks and Loading Docks: These are high-traffic areas where a lot can happen. Capturing vehicle details and monitoring deliveries is crucial for many Sydney and Newcastle businesses.
A common mistake is placing cameras too high. You might get a great overview of the room, but you'll only see the tops of people's heads. Aim for a height of about 3-4 metres—high enough to be out of easy reach but low enough to capture facial details.
Avoiding Rookie Mistakes
Even the best cameras are useless if they’re installed poorly. A few simple mistakes can completely undermine your entire system, and we see them all the time.
First, watch out for the sun. Pointing a camera directly at a strong light source, like the rising or setting sun, will blind it. The glare will wash out the image, making the footage completely useless for half the day. Always think about the sun's path before you drill any holes.
Second, consider the local weather. For businesses on the Central Coast or near the Newcastle coastline, salt spray and moisture can be a real killer for outdoor electronics. Ensure your outdoor cameras have a high IP rating (like IP66 or IP67) to withstand the elements. It’s a small detail that makes a huge difference in the lifespan of your gear.
If your site lacks easy access to power, you might also want to learn more about the benefits of solar powered security camera systems, which are designed for tough, remote locations.
Finally, you must be aware of Australian privacy laws. You generally cannot place cameras in areas where people have a reasonable expectation of privacy, such as bathrooms, break rooms, or change rooms. Always have clear signage indicating that surveillance is in operation. It’s not just good practice—it’s the law.
Running Cables and Mounting Your Cameras
This is where the rubber meets the road. Anyone can stick a camera to a wall, but the real mark of a professional commercial security cameras installation is what you don't see—the clean cabling and rock-solid mounts that ensure your system works flawlessly for years.
I’ll never forget a callout to a warehouse in Western Sydney. The owner had tried to save a few bucks on installation, running exposed cables along the floor and up the racking. It worked fine for about a week, until a forklift driver, in a hurry, caught a cable and ripped not just the camera off the wall, but a good chunk of the wall with it. The repair bill was eye-watering.
That little story is a perfect, albeit painful, reminder: the physical installation is just as critical as the fancy tech you've bought. It's about building a robust system that can stand up to the daily grind of a busy workplace without letting you down.
The Magic of Power over Ethernet
Let's talk about the unsung hero of modern security systems: Power over Ethernet (PoE). In simple terms, PoE is a clever bit of tech that sends both power and data to your cameras through a single network cable.
Gone are the days of needing a qualified electrician to run a separate power point for every single camera. With PoE, it’s all done through one clean, efficient cable. This is the standard for a reason:
- It’s Simpler: One cable per camera makes for a much tidier and faster installation.
- It’s Cheaper: You save a bundle on electrical labour costs, as you don't need a sparky at every camera location.
- It’s More Reliable: It provides a stable, centralised power source from your NVR or PoE switch, protecting your cameras from power surges.
The bottom line is this: if your installer isn't using PoE for your IP camera system, you need to ask them why. It's the backbone of a professional and reliable setup.
Running Cables Like a Pro
The difference between a DIY job and a professional one is often in the cabling. Dangling wires are not just ugly; they're a safety hazard and an open invitation for someone to tamper with your system. The goal is to make the cables as invisible and inaccessible as possible.
This usually involves running them through ceiling cavities, wall conduits, or specialised cable trays. It's a meticulous job that requires the right tools and a bit of know-how. If you're looking for an idea of what's involved, our guide on data cabling installation breaks down the fundamentals of running structured cabling properly.
The heavy investment in security by businesses is a big reason why New South Wales leads the country in the commercial security camera market. From retail in Sydney's CBD to industrial sites in Newcastle, enterprises are relying on professionally installed systems to protect their assets and ensure workplace safety. This demand drives the adoption of robust installation practices and advanced tech, solidifying NSW as a leader in smart surveillance. To get a better sense of these market trends, you can learn more about the Australian CCTV market research.
Secure Mounting Best Practices
Finally, let's get those cameras securely on the wall. A wobbly camera is a useless camera. Proper mounting ensures your hardware is secure, weatherproofed, and aimed perfectly.
For outdoor cameras, especially bullet types, make sure they are mounted under an eave or with a weatherproof junction box. This protects the cable connections from the harsh Aussie sun and coastal rain.
When positioning, always check the camera's live view on a screen before you permanently fix it. Make tiny adjustments to the angle to eliminate blind spots and get the exact field of view you planned for. It’s this final bit of polish that turns a good installation into a great one.
Configuring Your System for Peak Performance
The cameras are up, the cables are neatly tucked away, and the hard yakka is done. Now for the fun part—breathing life into your system. This is where a good commercial security camera installation becomes a great one, as we move beyond the factory settings to create a smart, responsive security tool that actually works for you.
It’s tempting to just plug it all in and call it a day, but taking the time to properly configure your system is what separates a professional setup from an expensive toy. It's the difference between catching a genuine threat and getting woken up at 2 AM by an alert triggered by a possum wandering through the car park.
This final hands-on stage is all about fine-tuning your Network Video Recorder (NVR) and cameras to work perfectly for your specific environment, whether that’s a bustling café in Sydney or a quiet warehouse on the Central Coast.
Dialling In Motion Detection
Motion detection is one of the most powerful features in a modern security system. But if it’s not set up right, it can quickly become its biggest annoyance. You don’t want your phone buzzing every time a branch sways in the wind or car headlights sweep across your driveway.
The key is to create intelligent motion detection zones. Instead of letting the camera monitor the entire frame for any movement, you can draw specific boxes around the areas that actually matter.
- For a shopfront: You'd draw a zone around the doorway and windows, completely ignoring the public footpath.
- For a loading dock: Create a zone around the roller door and parked vehicles, excluding the busy road right next to it.
- For an office: The focus should be on corridors and entry points, not the windows looking out onto a busy street.
Most modern NVRs also let you adjust sensitivity levels. I always suggest starting with a medium setting and then tweaking it over a few days. The goal is to find that sweet spot where it catches a person walking into the frame but ignores all the irrelevant background noise.
Setting Up Secure Remote Access
Being able to check in on your Newcastle office from your phone while you're down in Sydney is a game-changer. But with this convenience comes a massive security risk if it's not set up properly. Far too many businesses leave their systems exposed to the internet with default passwords.
Your security system is a high-value target for cybercriminals. Failing to secure your remote access is like leaving the front door of your business wide open with a sign that says, "Help Yourself."
Here’s your action plan for locking it down:
- Change Every Default Password: This is absolutely non-negotiable. Change the administrator password on your NVR and the individual passwords for each camera. Use a long, complex password that isn't used for anything else.
- Enable Two-Factor Authentication (2FA): If your system supports it, turn on 2FA immediately. It adds a critical layer of security by requiring a code from your phone to log in.
- Keep Firmware Updated: Manufacturers regularly release updates to patch security holes. Make it a habit to check for and install new firmware every few months to stay protected.
For a deeper dive into protecting your network, our guide on how to secure your WiFi network has some excellent foundational tips that apply here too.
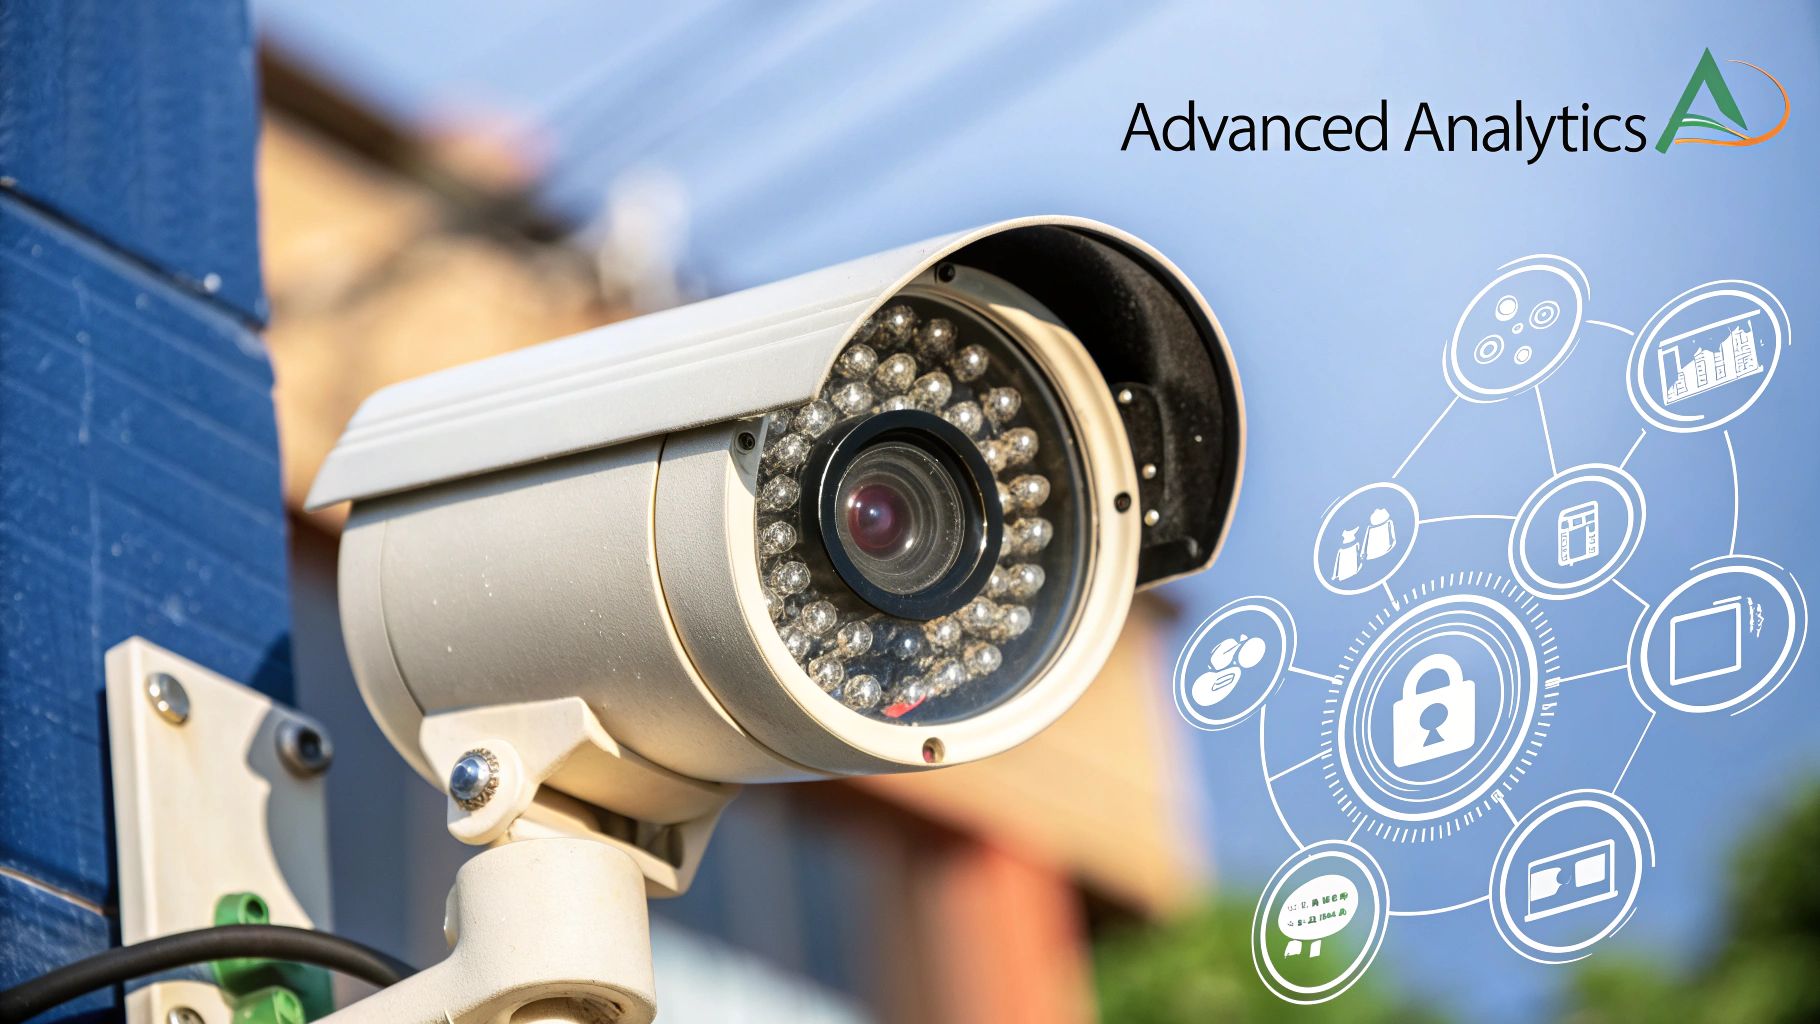
The entire Australian commercial security market is booming, and it's not hard to see why. Advancements in tech and growing public safety concerns are big drivers. Major hubs like Sydney are investing heavily in smart city infrastructure, using AI-powered CCTV with features like facial recognition and behaviour analysis. This trend really highlights just how important it is for individual businesses to keep their own systems secure and up-to-date.
Final System Checks and Testing
Before you sign off on the job, a full system test is essential. Don't skip it. Go through a final checklist to make sure everything is operating exactly as it should be.
I recommend walking through every camera’s field of view to confirm there are no unexpected blind spots. Test the remote access from your phone and another computer. Trigger a motion alert on purpose to make sure the notifications are coming through correctly.
Finally, review some recorded footage. Check that the image quality is crisp and that playback is smooth. This last pass guarantees your new system is truly ready to stand guard.
Common Questions About Business Security Cameras
Even after the tools are packed away and the installation looks perfect, it's totally normal to have a few questions buzzing around. Business owners from Sydney to the Central Coast often ask us the same things once the dust settles.
Let's run through a few of the most common queries we get about a commercial security cameras installation. Think of this as the final piece of the puzzle—understanding the day-to-day realities of owning a professional security system. It's not just about the hardware; it’s about the cost, the rules, and whether you could have just done it all yourself.
How Much Does a Commercial Security Camera Installation Cost in Australia?
Honestly, that’s a bit like asking, "How long is a piece of string?". The cost for a professional job can vary massively depending on what your business actually needs. It's definitely not a one-size-fits-all deal.
For instance, a small retail shop in Erina needing a solid 4-camera IP system might be looking at a few thousand dollars—somewhere in the $2,500 – $5,000 range, fully installed. But a large warehouse out in Western Sydney needing 16+ high-resolution cameras with complex, long-distance cable runs could easily push into the tens of thousands.
The main things that move the price tag up or down are:
- Camera Count & Quality: A 4K camera with fancy night vision and AI features will cost more than a standard HD model. Simple as that.
- Cabling Complexity: Running cable through a simple office ceiling is far easier (and cheaper) than drilling through multiple concrete walls in an industrial unit.
- NVR Storage: The more footage you need to store, and for longer, the more you'll invest in hard drive capacity upfront.
- Labour: This is the time it takes for a qualified technician to do the job properly, from planning to final testing.
The best advice I can give? Always get a detailed, itemised quote from a reputable local installer. Be extremely wary of ridiculously cheap prices—they're almost certainly cutting corners on equipment quality or labour standards, which will absolutely cost you more in the long run.
Do I Need to Tell Staff and Customers About the Cameras?
Yes. Absolutely. This isn't just about being a good boss; it's a legal requirement. In Australia, and particularly here in NSW, workplace surveillance laws are pretty strict. You can't just secretly film people.
You must have clearly visible signs at every entrance to your premises stating that security cameras are in use. This takes care of customers and any other visitors.
For your staff, it’s not only best practice but often legally required to have a clear, written policy on workplace surveillance that everyone is aware of. You need to be upfront about what you're monitoring and why. Crucially, you generally can't install cameras in places where there's a reasonable expectation of privacy—think bathrooms, change rooms, or staff break rooms.
Being transparent isn't just about ticking a legal box; it's about maintaining trust with your team. To be safe, always check the latest guidelines from Fair Work Australia to ensure you're fully compliant.
Can I Install the Security Camera System Myself?
Look, technically, you can for some of those simple plug-and-play systems you find at the big-box retailers. But for a proper, commercial-grade security system? I'd strongly advise against it unless you genuinely know what you're doing.
There's a massive difference between sticking a Wi-Fi camera on a shelf and installing a robust, wired IP camera system. A professional commercial security cameras installation involves so much more than just mounting hardware.
You need to run data cabling correctly, which often requires a registered cabler licence in Australia. You have to configure network settings on the NVR to make sure everything talks to each other properly. Most importantly, you need to harden the entire system against hackers by changing default passwords and setting up secure remote access.
A professional installer brings years of experience. They know the best camera placements for maximum coverage, how to avoid common mistakes like sun glare, and how to set up the system to achieve your specific security goals. A dodgy DIY job can leave you with critical blind spots, unreliable footage, and a system that's a wide-open invitation to cyber threats. Getting it done right the first time by a pro is almost always the smarter investment.
Ready to secure your business with a professional, no-nonsense security system? The team at Advanced Comtech has been helping businesses across the Central Coast, Sydney, and Newcastle for over three decades. We design and install reliable security solutions that just work.
Get a quote for your commercial security camera installation today!