
So, that glorious white box has finally landed on your doorstep, promising internet speeds the NBN can only dream of. A successful Starlink install, however, starts before you even touch a drill. A bit of planning now will save you a world of pain, a few unnecessary holes in your roof, and a lot of swearing later.
Your Pre-Flight Checklist for a Flawless Starlink Install
Before you get carried away by the excitement of unboxing ‘Dishy McFlatface’, let’s pump the brakes and map out a game plan.
We once had a mate in Gosford who was so keen he just slapped the dish on the easiest bit of roof he could reach. It worked brilliantly… until the afternoon sun hit the neighbour’s massive gum tree, and his connection dropped out every arvo from 3 PM onwards. Don’t be that bloke. A solid plan is non-negotiable for a reliable Starlink install.
Finding the Perfect Spot with the Starlink App
Your first port of call is the Starlink app itself. It has a brilliant tool called “Check for Obstructions” that uses your phone’s camera to scan the sky. This isn’t just a gimmick; it’s the single most important step you’ll take.
- Download the App: Chuck it on your phone before you do anything else.
- Walk Your Property: Head outside to the general areas you’re considering for the dish. This could be your roof, a shed, or even a pole in the backyard.
- Scan the Sky: Open the app, select the obstruction tool, and follow the prompts. It will ask you to point your camera at the sky and scan a massive arc.
The app shows you a digital representation of the sky and highlights any trees, buildings, or chimneys that might get in the way. It needs a massive, clear 100-degree field of view to work its magic. What looks like a small branch to you could be a major signal blocker for the dish as it tracks satellites whizzing overhead.
The goal is to find a location that the app gives a big green tick of approval. If it’s flagging even small obstructions, you need to find a higher or clearer spot.
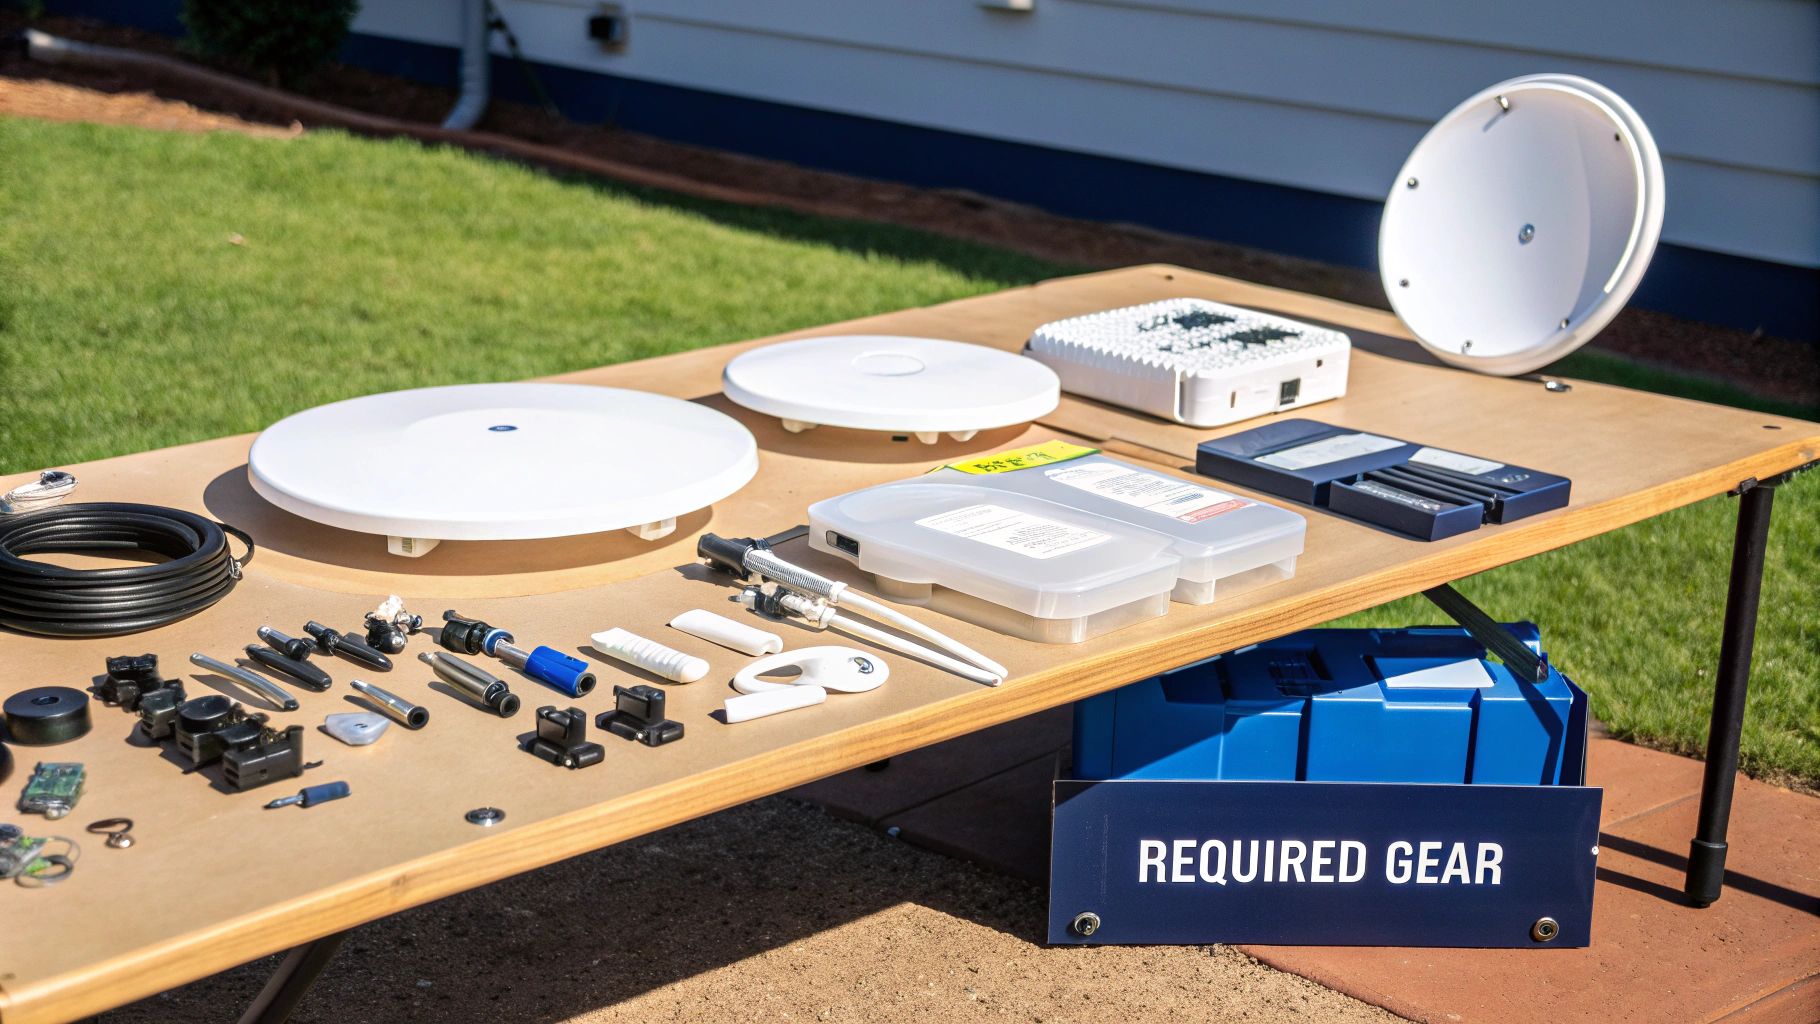
Gathering Your Tools of the Trade
Once you’ve found a prime location, it’s time to assemble your toolkit. Having everything on hand makes the actual installation process much smoother. Think of it like preparing for any project—a bit of organisation goes a long way.
The tools you’ll need are similar to what’s required for a secure TV wall mounting job, focusing on safety and a solid fixture.
You don’t need a professional workshop, but a few key items are essential:
- A sturdy ladder
- Drill with the right bits for your wall/roof material
- Spanners or a socket set
- Weatherproof sealant (like silicone)
- Cable clips or ties
Taking thirty minutes to do this prep work is the difference between a clean, professional-looking setup and a weekend-long headache.
Finding the Perfect Mounting Spot
Right then, you’ve used the app and found a patch of sky Dishy is happy with. Now for the slightly more permanent decision: where to actually mount the thing. This isn’t just about whacking it on the roof and calling it a day; the spot you choose for your Starlink install will affect everything from signal reliability to the integrity of your roof.
It’s all about making a smart choice that suits your specific property. A standard roof bracket works for most, but what if you’ve got a tricky roofline or live surrounded by towering gum trees?
We once helped a family out in the Blue Mountains whose property was shadowed by massive eucalypts. A roof mount was useless. Instead, we installed a sturdy pole mount at the far end of their backyard, the one spot that had a clear view north. It required a bit of extra trenching for the cable, but the result was a rock-solid, dropout-free connection they couldn’t have achieved otherwise.
Choosing Your Weapon: The Best Mounts
Your choice of mount is critical, especially when dealing with the unique challenges around the Central Coast and Newcastle. The salty air along the coast can be brutal on metal, and those classic terracotta roof tiles are notorious for cracking if you look at them the wrong way.
Here are the most common options we work with:
- Standard Roof Mount: This is the go-to for many homes. It’s fixed directly to the roof trusses, offering great stability. The key is proper sealing to ensure you don’t invite the next big Sydney downpour into your attic.
- Fascia Mount: A brilliant option if you want to avoid drilling into your roof tiles altogether. It attaches to the fascia board along the edge of your roofline, keeping the dish high and clear without compromising your roof’s waterproofing.
- Pole or Mast Mount: As with our Blue Mountains story, this is the ultimate problem-solver for properties with significant obstructions. It gives you the freedom to place the dish wherever the view is best.
Thinking Beyond the Signal
Beyond just finding a clear sky, you need to consider the entire system. A perfect signal is useless if your Wi-Fi can’t reach the back office or the kids’ rooms.
The dish’s location dictates where the cable enters your home, which in turn affects where your router will live. This is a good time to think about your internal network and decide if you’ll need to explore a Wi-Fi extender vs a mesh network solution to get coverage across your whole property.
Remember, the best Starlink install is one that’s planned from the dish all the way to your device. A professional installer considers the entire journey of the signal, not just the first step.
The good news is that Starlink installation in Australia has become much more professional, especially in areas with tricky environmental conditions. Licensed installers can provide precise dish placement, route cables cleanly, and handle any tricky mounting situations. Making the right choice now ensures you get a robust connection and a waterproof roof for years to come.
Running Your Cable Like a Pro
Right, so the dish is up on the roof, pulling down those sweet satellite signals. Fantastic! But now you’ve got a long, black cable hanging down the side of your house like a stray liquorice strap. This is where a good install becomes a great one. Let’s make sure your high-tech Starlink setup doesn’t look like a dog’s breakfast.
This part is all about the art of clean, professional cable management. Getting that cable from the outside in with minimal fuss and maximum neatness is what separates a tidy job from a messy DIY disaster.
First up, you need to choose your entry point. This could be through the wall cavity, down into the roof space, or by using an existing entry point like a vent. A well-placed hole is far easier to seal and hide.
I remember a job out near Woy Woy where a homeowner drilled straight through the middle of a wall, only to find it came out directly behind a massive, built-in wardrobe. A bit of planning would have saved a massive headache and a very awkward conversation.
Choosing the Path of Least Resistance
Once you’ve picked your spot, the real fun begins. You want this cable to be as invisible as possible.
- Wall Cavities: If you’re comfortable doing it, fishing the cable down an internal wall is by far the cleanest method. It keeps everything completely out of sight for a truly professional finish.
- Skirting Boards: A classic trick is to run the cable along the top of your skirting boards, tacking it down with small, colour-matched clips. It’s surprisingly effective at making the cable just blend in.
- Roof Space: Running the cable through your attic or roof space and dropping it down an internal wall near your router is another top-tier option, especially in single-storey homes.
For a more detailed look into the techniques we use for this kind of work, check out our guide on professional data cabling installation. It’s full of tips that are just as handy for a Starlink job.
This simple graphic breaks down the core planning steps, and you’ll see plotting your cable route is a key part of it.
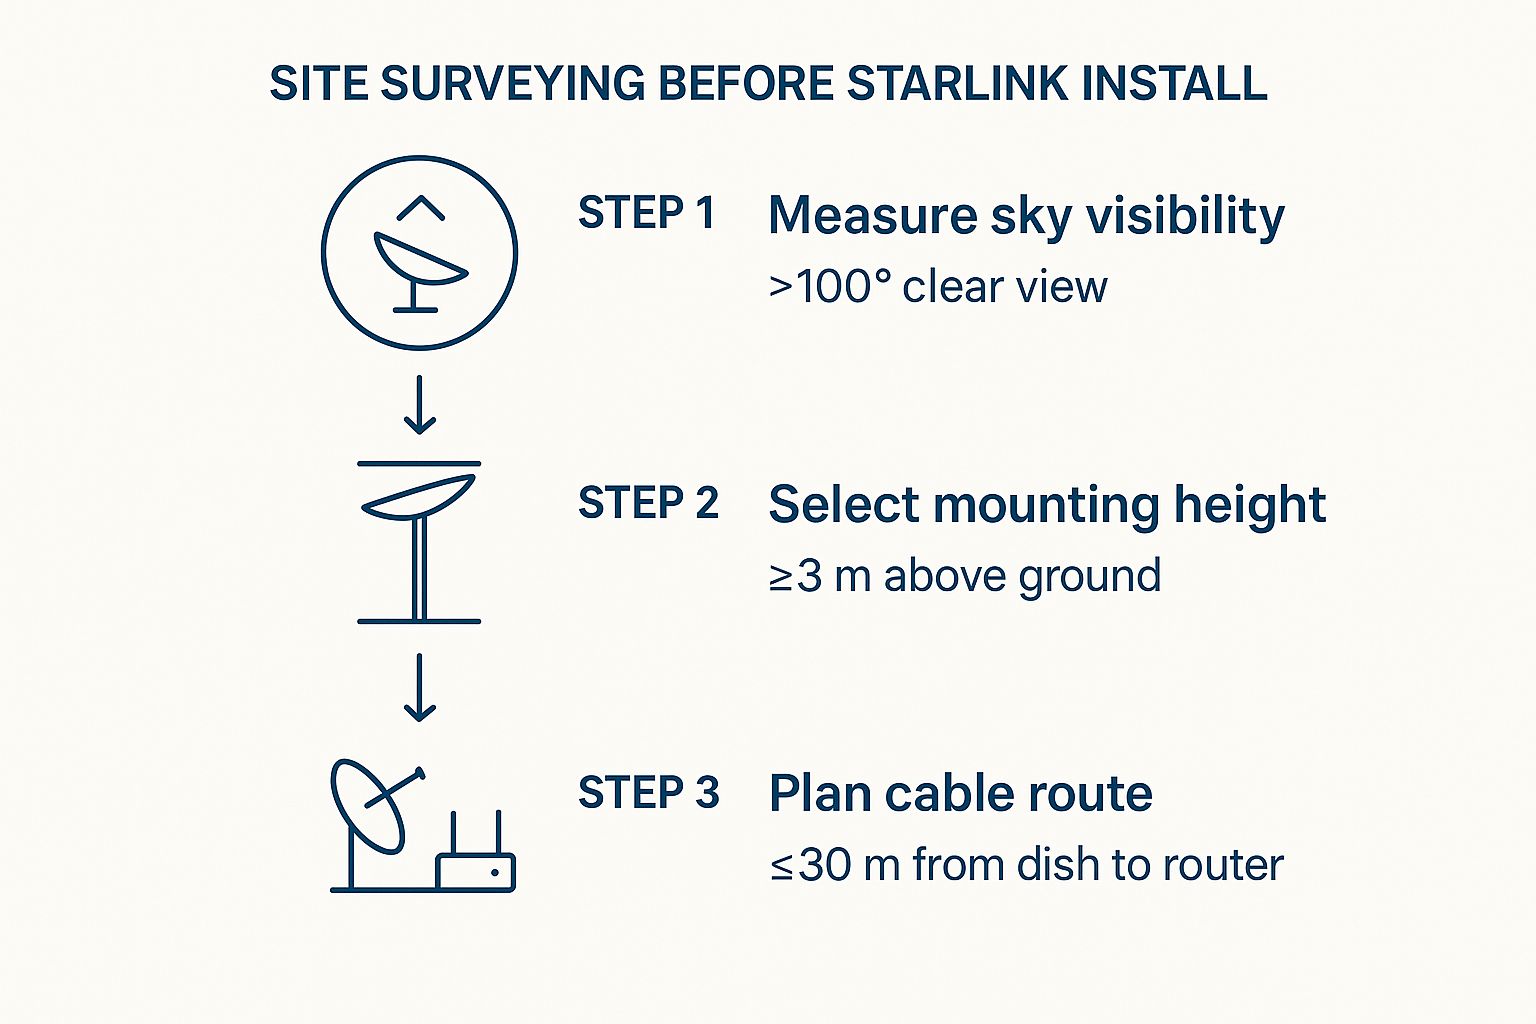
As you can see, planning the cable run is just as important as getting that clear view of the sky.
Sealing the Deal Against the Elements
Finally—and this is absolutely critical for any Central Coast home—you must properly weather-seal the hole you’ve drilled. A generous amount of high-quality, outdoor-rated silicone sealant is your best mate here.
Don’t skimp on the sealant. A poorly sealed entry point is an open invitation for water, draughts, and all sorts of Aussie critters you’d much rather keep outside.
Apply it both inside and outside the hole to create a completely watertight barrier. This simple step ensures your slick new internet connection doesn’t come with an unwelcome side of water damage during the next big southerly buster.
Powering Up and Getting Connected
Alright, this is the moment of truth. With the dish mounted and the cable run, it’s time to bring your new super-fast internet to life. This is easily the most satisfying part of any Starlink install, where all that hard yakka finally pays off.
First, plug the Starlink cable into the router, connect the power cord, and flick the switch at the wall. You’ll see the router’s lights start to blink. Now, you just need a little patience. For the next few minutes, Dishy will run through a pretty amazing self-alignment sequence. You’ll see it tilt and turn all on its own, scanning the sky to lock onto the satellites flying overhead.

The incredible speed you’re about to experience is all thanks to Starlink’s constellation of Low Earth Orbit (LEO) satellites, positioned just 550 kilometres above us. It’s a huge improvement on old-school satellite internet, which uses geostationary satellites parked way out at 35,000 kilometres. That much shorter distance is exactly why your connection will feel snappy and responsive, much like NBN fibre in the city.
Finalising with the Starlink App
While the dish is getting itself sorted, grab your phone and fire up the Starlink app. Think of this as your command centre for the final stretch. The app will guide you to connect to the temporary Starlink Wi-Fi network to complete the configuration.
You’ll be prompted to:
- Set Your Wi-Fi Name (SSID): This is the network name that will appear on your devices. Pick something memorable, maybe “The Shire” or “NBN Killer.”
- Create a Strong Password: Seriously, don’t use “password123.” A solid password is your best first defence against anyone trying to hop onto your network uninvited.
Once you’ve entered your new network name and password, the router will restart itself. Give it a minute or two, then you can connect all your devices to your brand new network and get online.
Now for the fun bit. Open the app again, find the speed test tool, and hit ‘Start’. Watching those download numbers climb into the hundreds for the first time is a truly fantastic feeling. Welcome to the fast lane.
Optimising Your New Starlink Setup
Alright, you’re officially online. That first speed test probably made you want to shed a tear of joy, right? But just getting connected is one thing; getting the most out of that connection is the next bit of the puzzle. It’s the final tweaks and knowing how to handle the occasional hiccup that turns a good Starlink install into a brilliant one.
This is your guide to living happily ever after with your new internet, making sure it keeps running like a dream long after installation day. It’s no surprise Starlink’s popularity has absolutely exploded in Australia, now with over 200,000 users and counting. That huge number shows just how many of us in regional and rural spots were desperate for a decent connection where the NBN just wasn’t cutting it.
Making Friends with the Starlink App
Your first port of call for pretty much anything should be the Starlink app on your phone. It’s way more than just a setup tool—it’s the dashboard for the health of your entire system.
Get familiar with the ‘Stats’ page. It might look a bit technical at first, but it gives you real-time info on your connection’s latency, uptime, and any tiny outages you might not even notice.
If the app flags an obstruction, don’t panic. Sometimes it’s just a temporary thing as your dish finds its feet. But if you see persistent red on the obstruction map day after day, it might mean a pesky gum tree branch has grown a bit since your initial scan. A slight adjustment to the dish or a quick trim of the branch might be all it takes.
Don’t just set it and forget it. Pop into the app every now and then, especially after a big storm or a particularly windy day, just to make sure everything is still running optimally. A quick health check can save you from bigger headaches down the track.
Maximising Your Wi-Fi Reach
The standard Starlink router is decent, but its signal can have a tough time in larger, double-brick homes or those sprawling properties you find around the Central Coast. Where you place the router is absolutely critical.
- Central Location: Try to put it in the middle of your home, not tucked away in a corner cupboard next to the modem.
- Keep it High: Placing it on a shelf rather than the floor gives the signal a much better chance to spread out.
- Avoid Obstacles: Keep it away from thick walls, large metal appliances (like the fridge!), and even fish tanks. Water is terrible for Wi-Fi signals.
If you’re still getting dead spots, it’s probably time to look at a mesh Wi-Fi system. These systems use multiple nodes, or points, to blanket your entire property in a seamless Wi-Fi signal. They get rid of those frustrating dropouts in the back bedroom or the shed once and for all.
They integrate perfectly with your Starlink connection, making sure those fantastic speeds actually reach every corner of your house. If you’re struggling with these final optimisation steps, exploring a professional Starlink installation service on the Central Coast can ensure your setup is perfectly configured for your home.
Frequently Asked Questions
Got a few questions rattling around in your head about a Starlink install? You’re not alone. We get calls every day from folks across the Central Coast, Sydney, and Newcastle asking the same things. Let’s clear up some of the most common queries we hear.
How Fast Is Starlink, Really?
This is always the million-dollar question, isn’t it? The speeds do vary a bit based on how many people are online and what the satellite coverage is like at any given moment, but you can realistically expect download speeds between 100 and 250 Mbps. On a clear day, we’ve clocked even faster results for our clients.
For anyone who’s been battling with slow NBN satellite or unreliable 4G, that kind of speed is a massive leap. It’s the difference between buffering and bliss. You can stream 4K on a couple of TVs at once, your Zoom calls will be flawless, and you won’t have to wait an age for big files to download. It honestly changes everything.
Can I Just Install It Myself?
You absolutely can. Starlink is designed with DIY in mind, and the kit comes with a basic stand to get you started. If you’ve got an obvious spot on the ground or a simple, flat roof that’s easy to get to, you might be sorted.
But, let’s be realistic. The second you’re dealing with a typical Aussie pitched roof, slippery tiles, or you need to get the dish up high to clear those gum trees, the job gets a lot more complicated. That’s when it’s a smart move to call in a pro – not just for convenience, but for safety.
A professional installer shows up with the right safety harnesses, knows how to securely mount the dish without creating a future roof leak, and has all the tricks to run the cable so it’s neat and out of sight. It takes all the stress out of the job and guarantees it’s done right the first time.
What Happens When It Pours Down with Rain?
Good old Aussie weather! We get this question constantly, usually from people scarred by old-school satellite TV that would drop out if a cloud even looked at it the wrong way. Starlink is a whole different beast.
The dish is built to cope with pretty much whatever the sky throws at it. During a truly torrential downpour—we’re talking a full-on tropical storm where you can’t see five metres in front of you—you might notice a temporary dip in performance. But for 99% of heavy rain events, you won’t even notice a flicker. Your Netflix marathon is safe, I promise.
Does the Dish Move Around?
Unlike the old satellite dishes that needed to be pointed with military precision, the newer Starlink Gen 3 dish is a ‘set and forget’ piece of kit for permanent installations. It doesn’t have any motors and doesn’t physically move at all.
It uses a really clever bit of tech called a phased array antenna. This lets the dish electronically ‘steer’ its signal to lock onto the satellites as they fly overhead, all without physically moving. It’s a brilliant design because fewer moving parts means there’s much less to break down the track. You just mount it flat, and the dish handles the rest.
Ready to stop worrying about the install and start enjoying ridiculously fast internet? The team at Advanced Comtech has done countless Starlink installations all over the Central Coast. We’ll find the perfect spot for your dish, run the cabling cleanly, and guarantee a professional, leak-proof setup that’s optimised for the best possible speed. Get in touch with us today for an install that’s completely hassle-free.